|
 Photo Correction in Photoshop 7.0 Photo Correction in Photoshop 7.0
In general you should complete the steps in this order, though not all processes might be necessary for every image. Some touchups such as increasing color saturation or sharpening might be best done on only a selected portion of an image. Before you start, always make a copy of your untouched image and save it as a backup and archive.
Step 1. Determine the correct dimensions and image resolution for your final work.
This will depend on what you plan to do with it. Image resolution refers to the number of small squares, called pixels, that make up the image and provide it’s detail and colors. The greater the number of pixels an image contains, the larger the file size.
In computer graphics, there are different types of resolution. Image resolution refers to the number of pixels per unit length in an image and is measured in ppi (pixels per inch)
The number of pixels per unit length on a monitor is called monitor resolution, measured in dpi (dots per inch) In day-to-day use, these units are used interchangeably, though they are not the same and can cause some confusion when your image resolution is higher than your monitor resolution. In this case, the image will appear larger on screen than it’s specified print dimensions. This is because in Photoshop, image pixels are translated into directly into monitor pixels, therefore, a 1 inch by 1 inch image at 144 ppi will display as a 2 inch by 2 inch image on a 72 dpi monitor. It will print as 1 by 1, but display larger. If you’re working with images greater than 72 ppi, it’s a good idea to display rulers and or check the print size to monitor the “real” dimensions of your work.
If you plan to print the image, then you have to be aware of the output resolution of your printer. A higher resolution printer will get best results from higher resolution images. If you are working with a service bureau or journal the easiest thing to do is ask them what resolution (and image format) is best. If you are printing on a standard laser printer in Life Sciences, 120 to 150 dpi is about right. If you have your own color inkjet, it’s best to experiment but it will probably be in the same range.
The two most important things to remember about image resolution:
- Bit-mapped images can become enormous, and the quality of the output is determined by the resolution of the output device. If your ultimate goal is for the display on a web page or on a computer screen, such as a Powerpoint presentation, then save the image at no more than 72 ppi.
- “Resizing” an image in Powerpoint, Word or a page layout program changes only the display of the image, it does not reduce file size. If you fill your Powerpoint slide show with 300 ppi, 11 by 14 images, then shrink them down to fit the slide, all that pixel information remains, and you are going to end up with an enormous, unwieldy file. Reduce file size "for real" in Photoshop, then save as copies for Powerpoint.
Step 2. Crop the image 
Virtually every image needs at least some cropping to remove unwanted detail that distracts from the subject and creates unnecessary file size.
 Step 3. Adjust the tonal range using Image>Adjustments> Levels. Step 3. Adjust the tonal range using Image>Adjustments> Levels.
It’s a rare photo that isn’t improved by some adjustment to it’s highlights, shadows and midtones . This can also be done automatically by Image> Adjustments> Autocontrast, which is handy when you’re in a hurry, but in general you get better results by doing it manually with Levels.
Step 4. Remove unwanted artifacts and repair image
 The clone stamps, healing brush and patch tool, along with the history palette, are powerful tools that can be pure magic. Use them wisely. The Rubber Stamp hase been probably the most widely used of the retouching tools. You first have to determine the area of the image you want to clone FROM – them press Option(or Alt on the PC) to “pick up” the pattern there. Next, move your cursor to the unwanted object, then drag or click on it. You’ll see a crosshair appear at the original source point, indicating where you’re copying from. Clicking randomly here and there on your unwanted object usually results in more realistic results, as the human eye is very good at picking up the repeated patterns that can occur from smooth dragging. Aligning the source point with the destination point is usually more precise in keeping lighting conditions and shadows similar, and changing source points frequently when erasing a larger area also reduces unwanted patterns. The clone stamps, healing brush and patch tool, along with the history palette, are powerful tools that can be pure magic. Use them wisely. The Rubber Stamp hase been probably the most widely used of the retouching tools. You first have to determine the area of the image you want to clone FROM – them press Option(or Alt on the PC) to “pick up” the pattern there. Next, move your cursor to the unwanted object, then drag or click on it. You’ll see a crosshair appear at the original source point, indicating where you’re copying from. Clicking randomly here and there on your unwanted object usually results in more realistic results, as the human eye is very good at picking up the repeated patterns that can occur from smooth dragging. Aligning the source point with the destination point is usually more precise in keeping lighting conditions and shadows similar, and changing source points frequently when erasing a larger area also reduces unwanted patterns.
Photoshop 7.0's new healing brush and patch tool are amazing though, in that they preserve the texture of the unlaying object.
Hint: For removing an object from a plain, relatively flat background with even lighting, simply making a selection of the background with one of the selection tools and pasting it over the object will do the trick. If you select the “feather” option (4 or 5 pixels) before making the selection, you’ll have a softer edge that will likely blend in better.
Hint: The Dust and Scratches Filter is a quick way to rid a scanned image of bits of dirt and and imperfections.
 Step 5. Remove unwanted color casts with Image>Adjustments>Color Balance Step 5. Remove unwanted color casts with Image>Adjustments>Color Balance
Improper color casts can be artifacts from digital cameras or scanners; aged photos or slides. If present, they are easy to correct in Photoshop. Even if you can’t see them it pays sometimes to play with color balance to see if it improves the image.
 Note on the Retouching Tools: You might want to improve the color, tone or contrast of selected parts of the image with the retouching tools. All of them use the Brushes Palette to determine their size, and many have an opacity setting and blending modes to consideras well. Note on the Retouching Tools: You might want to improve the color, tone or contrast of selected parts of the image with the retouching tools. All of them use the Brushes Palette to determine their size, and many have an opacity setting and blending modes to consideras well.
Step 6. Adjust saturation and brightness if necessary with Imagements>Adjust> Hue / Saturation.
This can be overdone, but is invaluable for a dull image. Often Powerpoint images will display much better if they are a little oversaturated. Sometimes just part of an image could stand some brightening with the sponge tool.
 Step 7. Sharpen image if necessary with Filters>Sharpen> Unsharp Mask. Step 7. Sharpen image if necessary with Filters>Sharpen> Unsharp Mask.
There are several sharpening tools in Photoshop, and all work by increasing the contrast between neighboring pixels. Sharpen and Sharpen More sharpens the entire image, or a selection, if you’ve made one. Sharpen Edges affects only those areas with the highest contrast.
But the rather pecularly named Unsharp Mask is the most powerful. It’s name refers to an older film compositing technique that corrects blurring introduced during the production process. By highlighting the edges of an image by combining a blurred film negative with the original film positive, it's able to by locate “edges”, or pixels that differ from adjacent pixels by an amount you specify, and accentuate them. Its affects are far more pronounced on screen than when printed, so you may have to experiment. You can also get good results by using the sharpening tool on parts of an image as well.
Amount – the degree (up to 500%) with which you want to sharpen the image. The higher the value, the more dramatic the effect. Values between 25 and 50% generally produce subtle effects. Between 50 and 300% are more pronounced.
Radius – the thickness of the sharpened edge. The higher the value, the more contrast. The ideal value depends on the resolution of your images (dots per inch) and the edge detail already present, and might be affected by old, grainy photographs and imperfections. For on-screen images such as web graphics, 0.5 results in fine, crisp edges. For printing, with a resolution of from 120 to 180 dpi, use a value of 1.0. Though the edges may appear more pronounced on-screen, on paper they’ll look better.
Threshold – how different two adjacent pixels have to be to be considered an edge. The value, from 0 to 255, is the “brightness value”. The lower the value, the lower the threshold, and they will be considered different and sharpened. The higher the threshold, the more likely they are to be excluded from the sharpening.
Hint: Sharpen incrementally by doing Command+F (Control +F in Windows) after you sharpen the first time. Using a filter once moves it to the “Last Filter” slot in the Filter Menu. The Command/Control F keyboard shortcut invokes Last Filter and you can continue to use it until you go too far. Back up a step with Command/Control Z or use the History Palette to back up even further.
Step 8. Save the image in the appropriate format. We’ll talk more about formats in another handout.
Notes:
- Always archive the original unedited image in Photoshop format and do your retouching on a copy.
- The higher the resolution the greater the file size.
- Correcting color and brightness (steps 4 – 6) is not always necessary, but virtually any image can be improved by cropping and adjusting tonal range.
- Results on screen may be different from printed results, so you may have to experiment, particularly for color correction and sharpening.
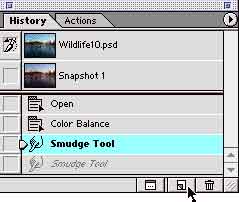 The History Brush allows you to selectively bring back parts of an image that you’ve saved as “Shapshots” in the History Palette. The History Brush allows you to selectively bring back parts of an image that you’ve saved as “Shapshots” in the History Palette.
|